Monday 29 April 2013

Gaming galore, and assembling

I've been playing a LOT of warmachine lately.   I've been trying to get in more than one game every time I go out.  I've worked a good schedule up with my wife for taking care of the baby so I think now I'll be able to reliably play more than once a week.  Last week in particular, I played probably 6 games on 4 different days! holy crap.  Here are some random photos:


This was a game against my good friend Paul who I unfortunately don't get to see too often anymore because of his work and school schedules.  Hopefully that will be changing soon.  We had some BBQ pork and went to the Legion for some beer before this game.  Just like old times. Super fun and of course I forget to take pictures after turn 1... zzZzzZz


This was a game I had against a Strategies regular who's identity I will keep concealed in case he doesn't want his name on my blog!  Great guy, good to see him out playing games on Sundays.  His force is really well painted and he's a great sport.  I remembered to take pictures up until turn 2 this time.  This second picture was gators failing to penetrate ARM 18 shield walled Iron Fang Pikemen.  I had another game before this one where I forgot to take pictures, but it was also a nice game.  I tried the mortitheurge willbreakers for the first time and really was impressed.  I didn't use ancillary attack all that often but puppet strings on your caster makes you feel so safe in not boosting something when you need averages; knowing you can reroll builds confidence.  Although they both eventually died to a single pistol wraith (in the same turn!) i still got their worth being able to get a couple disgusting ashes to ashes and killing a net 9 or 10 cryxians.  Good times! Again, thanks to everyone who came out to Strategies on sunday


------------------------------------------------------------------


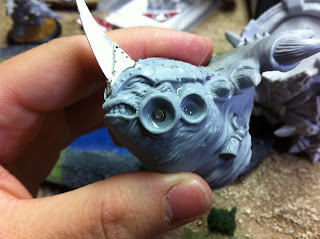
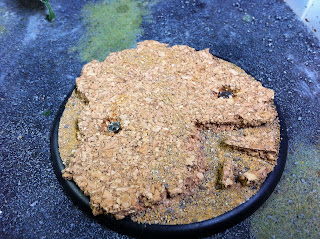
I've been building my mammoth over the past few days and really made some progress today with magnetizing and planning out the base/how i will break him down into paintable parts.  I decided the mammoth should be painted in 5 main parts, with the 2 big arms remaining separate (because they are joined to the shoulder by ropes so no green stuff is necessary), the hips+legs, (remain separate but are magnetized to the base because the torso joins the hips+legs with rope, again not needing green stuff), the torso+head+guns, and the base.  I decided to glue the small arms and head to the main torso part because the contact point between these pieces are all skin to skin; they will need putty and if i painted them separately first it would just look bad with gaps.


Tuesday 23 April 2013

Camouflage foto frisket revisited

I took a little different (and IMO better) approach to the camouflage on the imperial guard tanks.  This time, instead of cutting out a premade stencil found on google images, i made my own stencil with a pen just drawing on the foto frisket paper and cutting it out with scissors then applying it to the tank.  I cut the bone colored (VMA Sand) pieces thin, then cut the beige colored (VMA Flat Tan) pieces thicker to surround and encompass the thinner bone colored strips.  I like this effect, and I think with a little more planning it could look really slick.  i mostly just fudged this, but it turned out much better nonetheless


Saturday 20 April 2013

Paingiver Taskmaster

Finally got around to finishing this chick (?) well she's got boobs so it's either a tranny or a female skorne.  I was really happy with the steel, but I feel like my gold NMM has been a bit off lately.  I started this model a long time ago and have actually used it as "painted" but really it only had base colors on it except for the skin and red cloth.  I may just be getting a little impatient with painting skorne all the time.  If i think about it, I've been painting them steadily ever since MKI hordes - a testament to how long of a process it is.  After painting the Mammoth I'll probably take a little break from Skorne; I seriously need to get working on my Empire army for July's tournament and also want to push myself to make Chaos marines work for 40k (even though that game has really let me down lately, I've made a half agreement with a friend that if I play more 40k he'll play more warmachine).  There's also the circle stuff I really want to do, and I'm working on a warpwolf stalker right now and having tons of fun doing it.  Way off topic.. here's the taskmaster


Tuesday 16 April 2013

Masking test w/ camouflage

I picked up some Badger Foto Frisket sheets recently and wanted to give them a try.  I decided to do camouflage on an IG Demolisher to start.  I'm mixed about the results, but here's the step by step process I did. (it was super quick and easy).

I first primed the model white, and then layered a coat of VMA Sand all over the model, like so.  Before doing anything further, I found some "good" camouflage stencils from google image search.  I printed out the stencil onto a piece of foto frisket paper using a size i thought was appropriate.  i suggest printing out the size test first on a blank sheet of paper instead of ruining your frisket sheet.


My next step was applying some camouflage patches that I cut out with a small pair of scissors.  Because the Leman russ has so many rivets and uneven surfaces, it proved to be a bit difficult to stick the frisket paper sometimes.  I tried to be as random as possible.  I now realize I think I should try to make more of a pattern instead and probably should just draw my own camouflage on a the frisket paper directly.  this would enable me to make it a perfect size and modify the pattern to certain difficult areas on the tank itself.  I layered a coat of VMA Light Tan (i think this is the name) overtop.  This will be the mid color.

Next, I took more camouflage chunks out of the frisket paper and tried to apply them near the other camouflage areas at random locations.  This should create a 2stage gradient of the camouflage. This was more of a test than anything, because when I hand painted my camouflage on my old IG tanks, it was all a solid color and 2 toned only as opposed to 3 tones here.  Once all the camouflage was applied, it was time for the final color.

I coated the entire area VMA Burnt Umber.  I used a hair dryer to speed up the drying process on all stages of layering.

Aaaaaand.. it looks like a cow.  haha.  It's not bad, not totally what I expected, but I think IG tanks want more of a stiped camouflage pattern than a splotchy camouflage pattern.  It was a good lesson for next time though.  As previously mentioned, I'm going to design the pattern myself with a pencil and draw it on the frisket paper next time.  If i'm going to do the chunky camouflage, I should probably make it either a. bigger next time or b. just put more of it on.  I totally recommend Badger Foto Frisket paper, however.  It's really easy to use and can have many applications.  The only downside I found was it's hard to go over rivets and smaller pieces are sometimes hard to unstick from the paper when trying to peel it.  I also would advise waiting 24 hours until each layer is dry before applying more frisket or trying to peel any off your model - especially if you dont use a hair dryer to speed up the drying.


Friday 12 April 2013

All I need now is Mammoth

Like the title said, I'm just waiting a couple weeks for that Mammoth to complete my E.Hexeris list I've been working on. 

These willbreakers are just amazing sculpts.  I'm struggling to describe how even though these models are somewhat busy and have some seemingly complicated armor patterns in places, once they all come together they are very defined and well designed.  The only beef I have with the sculpt is the circular shaped blade that hangs at his waist.  This proved to be more frustrating than I'd have hoped to paint the steel on.  I didn't really know where to begin and thus didn't have a great plan and perhaps if I'd taken a little more time they could have turned out a little better. Oh well.   It was a somewhat odd shape to paint metal on (compared to the cyclops raider i previously finished, which had very easy shapes to work with).  The chains on their backs were extremely tedious to complete in NMM.  If I took about double the amount of time I could probably have made them look more defined and you could probably see more detail in the individual chain links, but alas, I was getting tired of painting the steel NMM and did a few less layers than I would have if I was still "in to it".  Overall, I think these guys turned out pretty decent.  It might just be me but it seems the gold is a little darker in general than most of my other stuff these days.  That could be from the small amount of surface area i had to work with for blending.  Anyways, bring on the Mammoth!


 And here is a group shot of my 50 point E.Hexeris list, minus the Mammoth, of course. Luckily I've registered for the model photography mini course at Lock and Load this year so I can possibly take better group pictures one day...

Sunday 7 April 2013

Sunday wargaming at Strategies

I sneaked away from baby duties today and played a game vs a friend at Strategies Games & Hobbies.  Strategies is unique in Vancouver because it's about the only place left that still enforces the "play it painted" rule.  Now that I have a good portion of my stuff finished I can actually field a decent force and have some options when i play here. I played Rasheth vs Venethrax (crap...) and after a close game and almost everything on both sides dead I admitted defeat.  It was an interesting situation, however, because I had bloodmark on venethrax, and the only thing on the board that could really kill rasheth was venethrax himself.  he didn't want to attack me, however, because he knew i would transfer the damage to him, possibly killing him.  the situation was not that simple though; earlier rasheth had bile thrall chunks spewed his way and got corroded.  corrosion does not expire within venethrax's control area.  oh shit.  like the clever opponent he was, my friend decided to just let rasheth corrode to death.  for fun, after conceding the game to my opponent, i asked him to swing at rasheth with venethrax, just to see if i could transfer the damage to him and take him out with bloodmark.  of course, he rolled exactly what he needed to kill himself! good times.  maybe this trick would've worked on a less experienced opponent but i digress.

i think this was a bad matchup for me with rasheth.  my list had exactly what he wanted - lots of titans to eat and steal fury from.  this was my first time vs venethrax, however, and i think next time i could do things differently.  since his list was mainly infantry, i dont think enraging the titans every turn is necessary.  instead, i should make sure i keep as little fury on them as possible so venethrax cant keep mulching through them.  also spacing them out a little and making sure venethrax has to choose 1 to go kill instead of getting 2 in a turn would be handy.  gators aren't particularly useful vs undead stuff either.

his list was
Venethrax
Seether
Defiler? bonejack with spray attack
Skarlock Thrall
Mechanithralls max
Bloodgorgers min 
Bile Thralls min fuck these guys
Necrosurgeon and Stitch Thralls
Gerlak Slaughterborn
Warbitch Siren
Bloat Thrall
Necrotech & bomb guy lol 

my list was
Rasheth tier 2 chain gang
Titan Gladiator
Bronzeback Titan
Titan Sentry
Gatormen Posse max
Paingiver Beasthandlers min
Swamp Gobbers Bellows Crew
Agonizer
Paingiver Taskmaster (proxied with Aptimus Marketh, I forgot the Taskmaster at home on the paint table)


 This was a game my other friend was playing.  both very nicely painted armies.  go strategies for this awesome rule.  the experience of playing a wargame is just so greatly enhanced by these amazingly painted little toy dudes.


Wednesday 3 April 2013

Almost there...

I finally finished a model since my son has been born.  Naturally I've had to take things a little slower than before due to lack of time.  I gotta say I was really putting the Cyclops Raider off because I wasn't too big on the sculpt but I think I did it justice.  I'm really happy with the steel this time, I found that lately I've been making the steel too bright overall and not putting effort in to making a good dark to light transition.  This time around I purposely left large areas of black while blending up to the white steel sheen.  MUCH better.  I need to remember this.  Like I always say, I also went in with a plan before paint even touched the steel areas.  Overall, I like this guy a lot now.  His helmet is kinda goofy but looks SWEET in NMM.  I need to get my hands on some decal paper so I can print Skorne symbols for all these banners. 


Also, here's a quick picture of my Willbreakers.  a work in progress.  these guys are so so so so so cool looking I'm glad a picked up a second, if not for rules purposes but for sheer awesome figs.  these guys remind me of batman for some reason.